linux网络相关
• ifconfig查看网卡ip(yum install net-tools)
• ifup ens33/ifdown ens33 • 设定虚拟网卡ens33:1 • mii-tool ens33 查看网卡是否连接 • ethtool ens33 也可以查看网卡是否连接 • 更改主机名 hostnamectl set-hostname aminglinux • DNS配置文件/etc/resolv.conf • /etc/hosts文件ifconfig 查看网卡的IP,centos6默认就有,centos7没有,需要安装一个包net-tools
yun install -y net-tool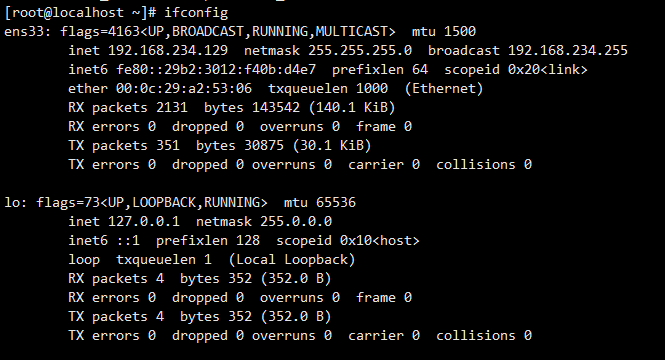
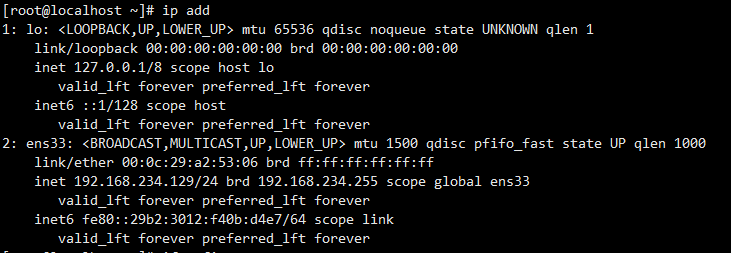
ip add 也可以查看网卡
ifconfig -a 在你网卡宕掉的时候或者没有IP的时候,ifconfig是查看不了的,用-a是可以查看到的。
ifdown ens33 关闭网卡

ifup ens33 启动网卡 
ifdown ens33;ifup ens33 这个命令在那些情况下使用呢?
在针对某个网卡进行更改,比如DNS等,更改完后需要重启服务,但是我不想把所有的网卡都重启,这个时候,就可以使用ifdown和ifup来单独重启这个网卡.ifdown ens33 &&ifup ens33 重启网卡

增加一个ip怎么做呢?
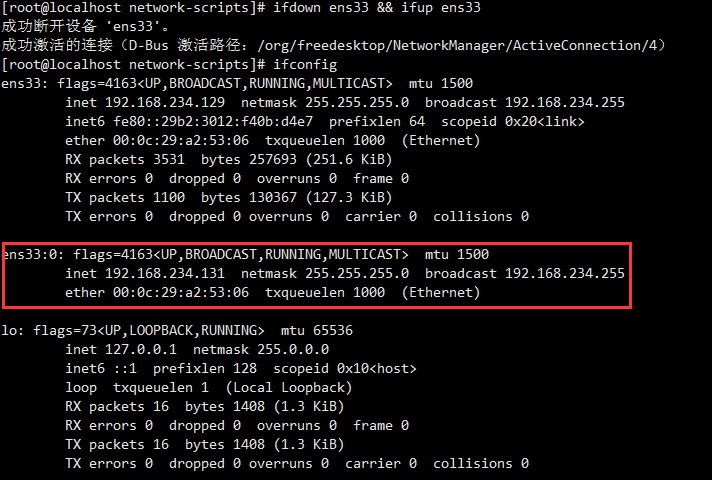
首先增加一个虚拟网卡,在虚拟网卡上添加一个IP 先到网卡配置文件里面,拷贝一个虚拟网卡[root@localhost ~]# cd /etc/sysconfig/network-scripts/[root@localhost network-scripts]# cp ifcfg-enss ifcfg-enss\:0[root@localhost network-scripts]# vim ifcfg-ens33:0
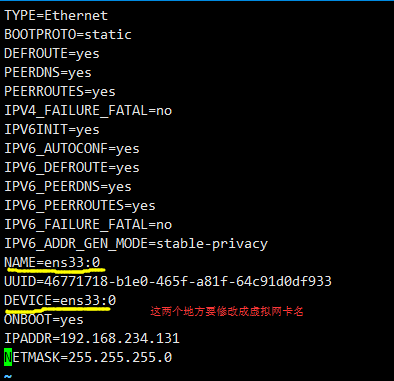
重启下网卡
# ifdown ens33 &&ifup ens33
在window上ping这个IP
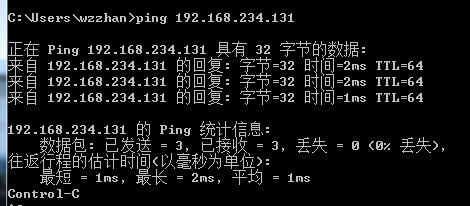
虚拟网卡会在lvs,keepalived 上用到。
查看某台电脑网线是否正常
mii-tool ens33
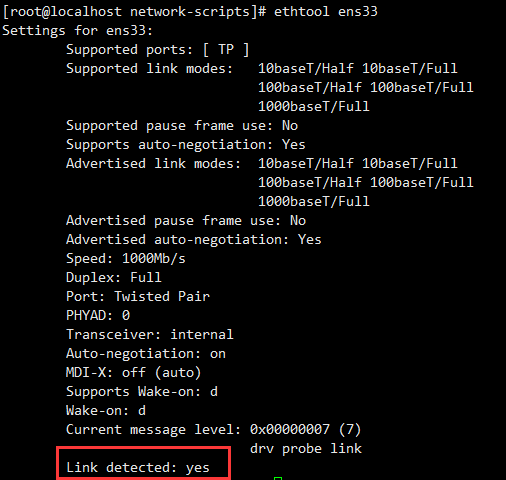
如果mii-tool 提示no link 可以用ethtool 来查看网卡是否正常

也可以用 ethtool ens33 来查看网卡是否正常
hostnamectl set-hostname aminglinux 更改主机名 centos7独有的
[root@localhost ~]# hostnamectl set-hostname wuzhou-001
hostname 查看主机名

主机名的配置文件 /etc/hostname
 如果想要生效,可以重新登录一下
 DNS的配置文件 /etc/resolv.conf
 dns是在配置网卡的时候写的。配置文件里面修改DNS是临时的,重启后就不能生效了,所以要去网卡配置里面修改DNS。
 域名解析 /etc/hosts 只在本机上生效

可以一个IP多个域名;用空格隔开 ;
如果是一个域名多个IP,只生效最后IP.linux防火墙-netfilter
• selinux临时关闭 setenforce 0
• selinux永久关闭 vi /etc/selinux/config • centos7之前使用netfilter防火墙 • centos7开始使用firewalld防火墙 • 关闭firewalld开启netfilter方法 • systemctl stop firewalld • systemctl disable firewalled • yum install -y iptables-services • systemctl enable iptables • systemctl start iptables永久关闭selinux
编辑配置文件 /etc/selinux/config,SELINUX=disabled ,然后重启服务
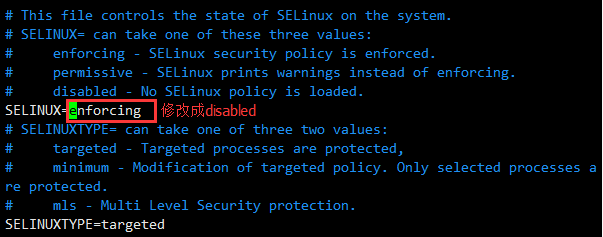
临时关闭selinux setenforce 0
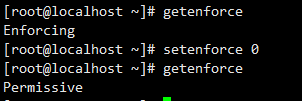
Enforcing 强制模式,代表 SELinux 运作中,且已经正确的开始限制 domain/type 了
Permissive 宽容模式:代表 SELinux 运作中,不过仅会有警告讯息并不会实际限制 domain/type 的存取 disabled:关闭,SELinux 并没有实际运作。linux防火墙 netfilter是centos5,6自带的
linux防火墙 firewalld是centos7的自带的centios7里面也可以使用 netfilter,那么怎么使用呢?
1)首先关闭contos7自带的firewalld
systemctl disable firewalld
2)关闭服务
systemctl stop firewalld
3)打开netfilter,打开前先安装一个包 iptables-service
yum install -y iptables-service
4)开启服务
systemctl start iptables
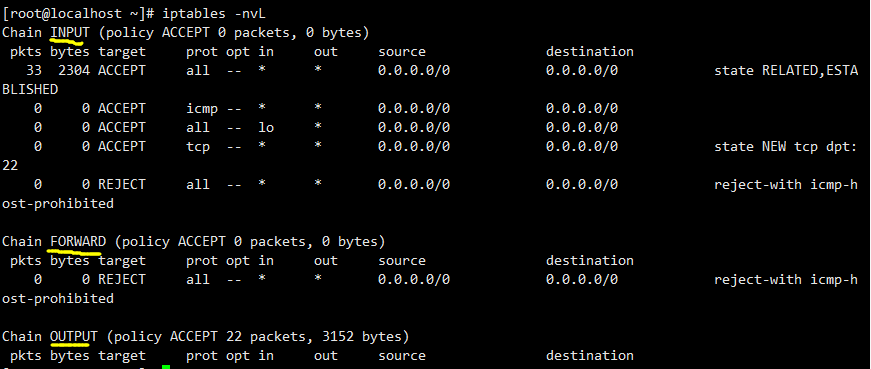
5)iptables -nvL 查看规则
